Post by Tom Cruise on Jul 2, 2016 18:48:09 GMT 8
Ok, here's my contribution on how to install a dash camera in perfection. I have done it on A4 B8 and today on A6 C7
1) Things you require:
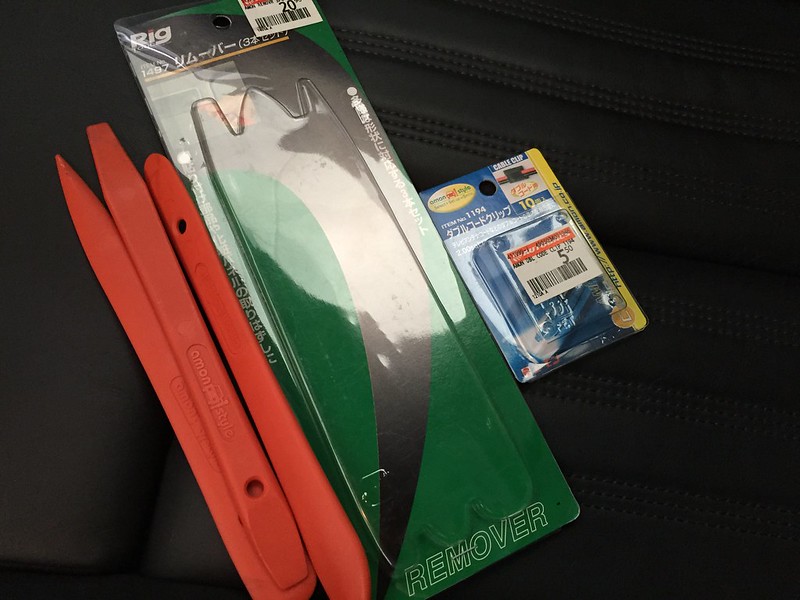
- Pry tools (buy from Autobac)
- 2 cable ties (buy from anywhere, Homefix or Self fix)
- wire holding clips (buy from Autobac)
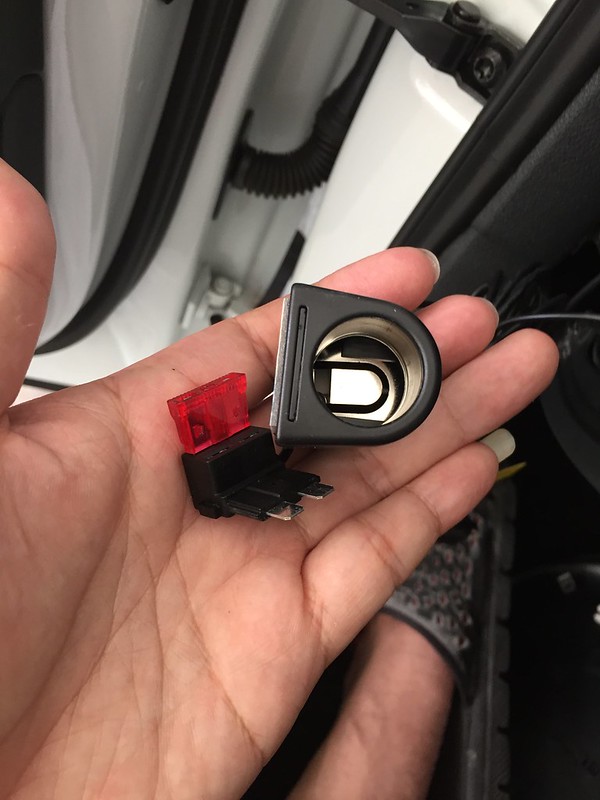
- 12V Socket tap to fuse (buy from Autobac)
- Camera of course
- Long nose plier (to remove the A pillar trim clips)
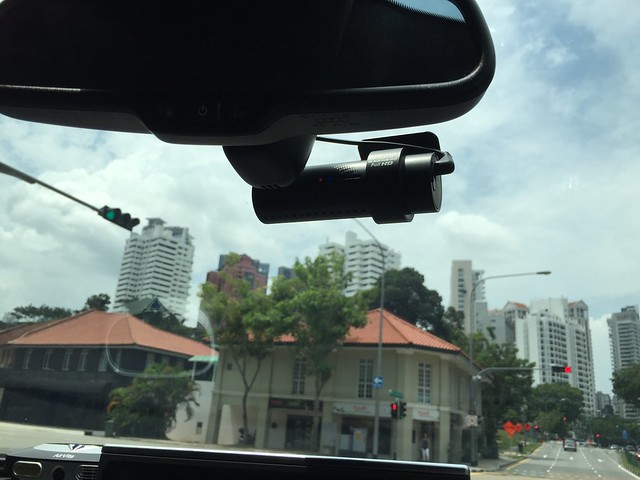
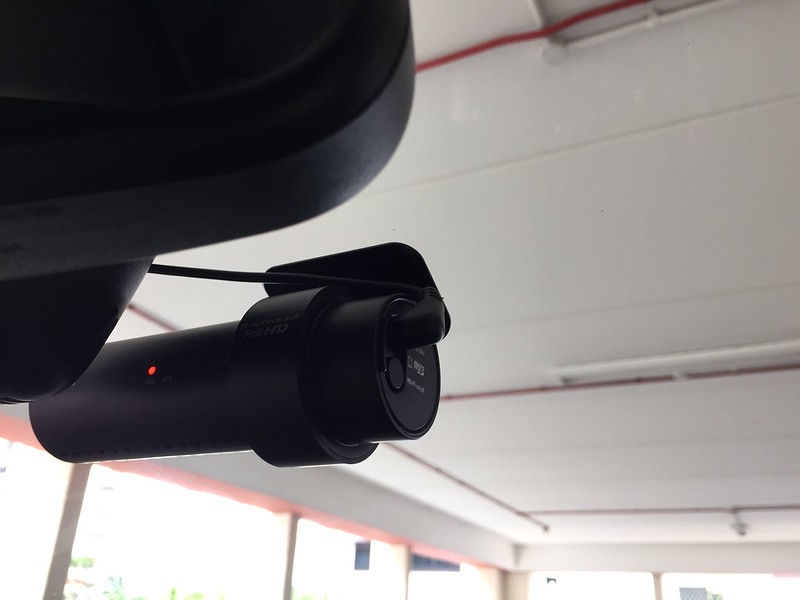
2) Next, Just stick the camera on the windscreen behind the rear view mirror. Note to align the lens to the centre of the vehicle.
3) Next step is the most difficult part but if do correctly, it can be quite easy. Just need the right motion and force.
REMOVING A PILLAR. The A pillar of the A6 C7 is the hardest to remove because of the 3 clips behind the trim, 2 of them are non-removable by prying. It has to be slot upwards, then remove the clip with a plier from the pillar then install back to the trim. If done correctly, it can be very easy.
First, remove the Airbag clip with the pry tool. Don't worry, there's no airbag behind this clip and you will not activate the airbag no matter what you do to the A pillar. Use your finger nail to pull it out a little then insert the pry tool and slowly go around it with the pry tool to lift it out of the notch. The main clip holding it are on the side, left and right of the word "AIR BAG"

Second, pull the top and first clip outwards
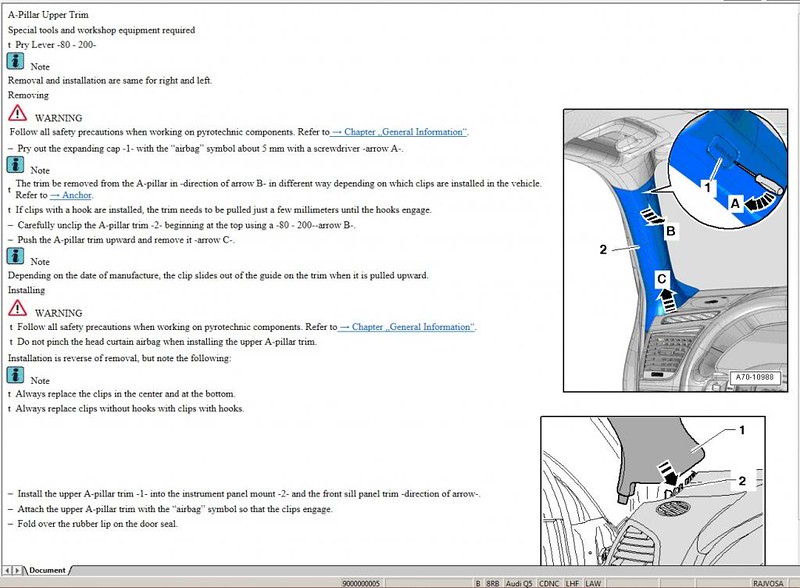
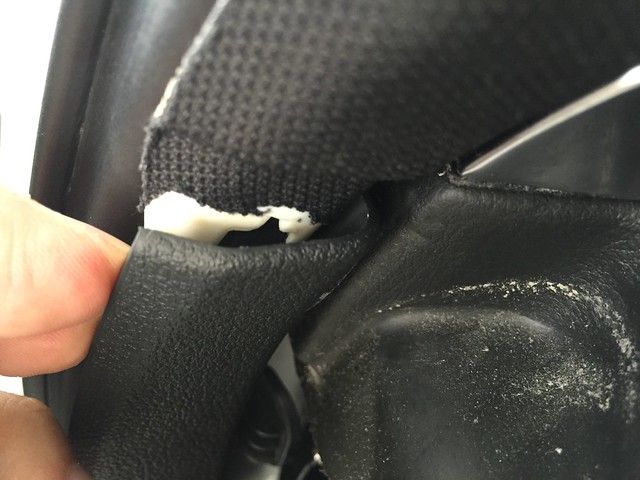
Third, it is almost impossible to pull outwards to dislodge the 2nd and 3rd clip. You have to combine upward motion plus outward motion to dislodge the A pillar. The trick is to hold the top part and make sure it is clear of the headlining and towards you. If you get this right, it is easy as a breeze.
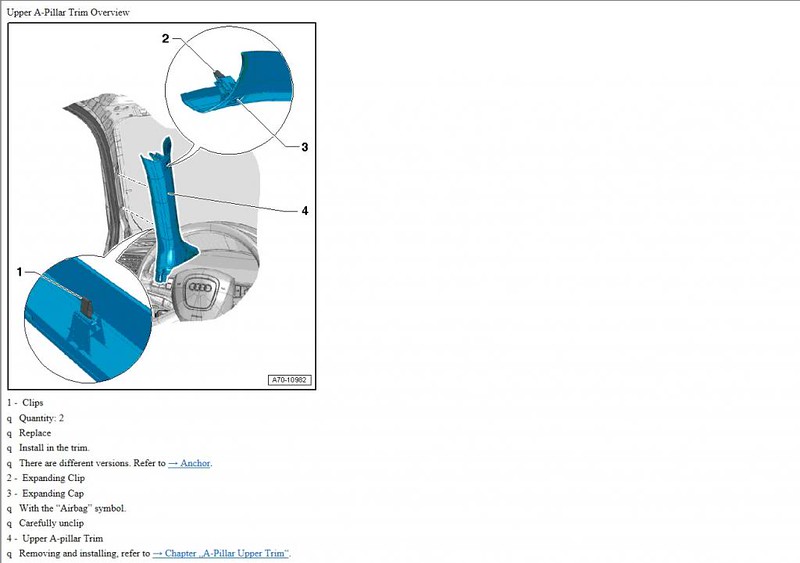
This the top clip, as you can see it there's no jaw so it will come out when you pry it.
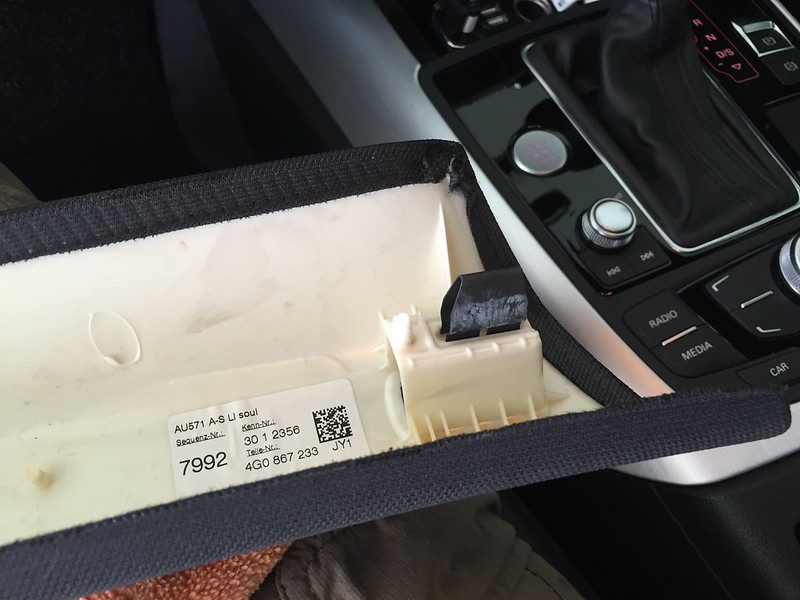
This is the 2nd and 3rd clip mount on the trip. After you remove the trim, the clip will stay on the pillar. Remove it from the pillar with the plier and reinsert on the trim for installation later.
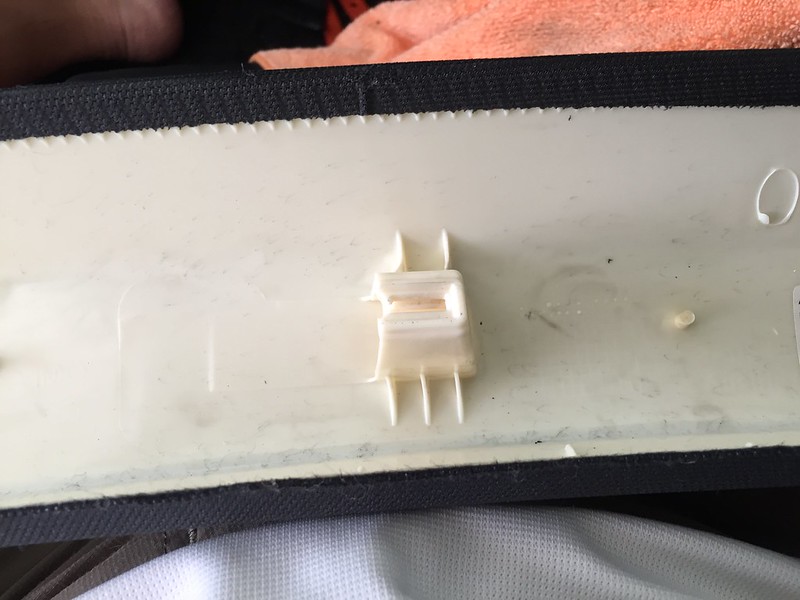
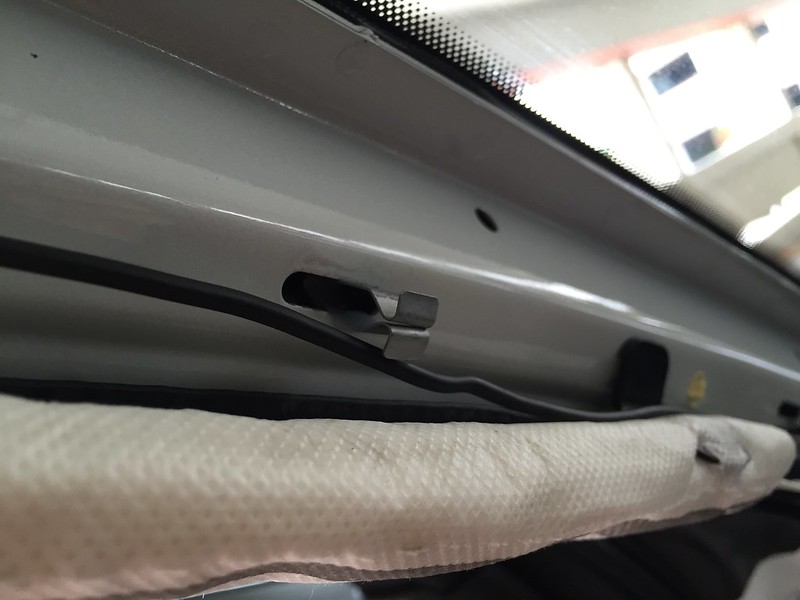
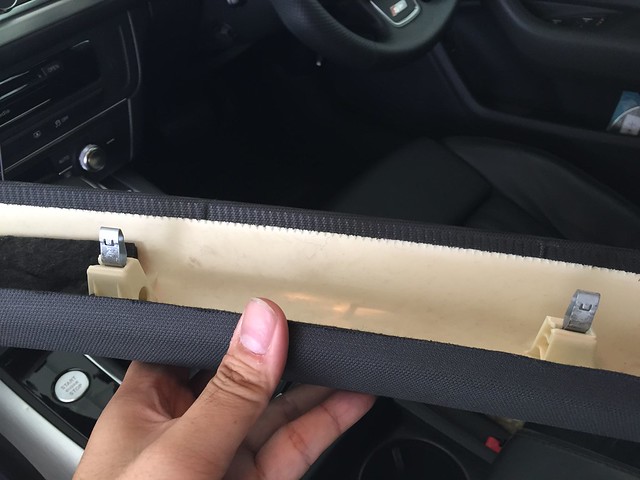
Now the pillar should be bare. So you can start routing the cable and install the 12V socket.
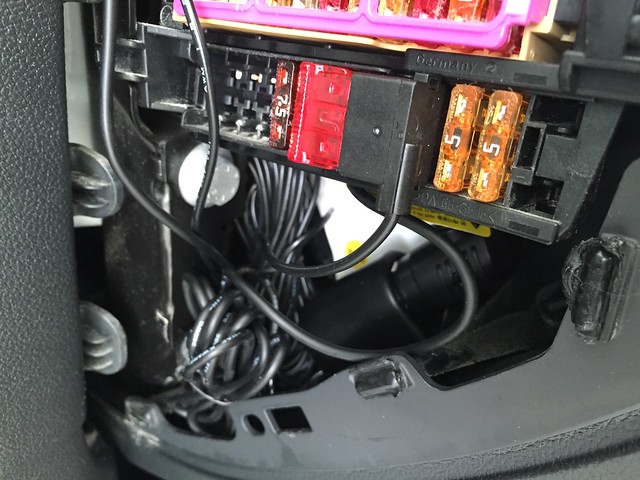
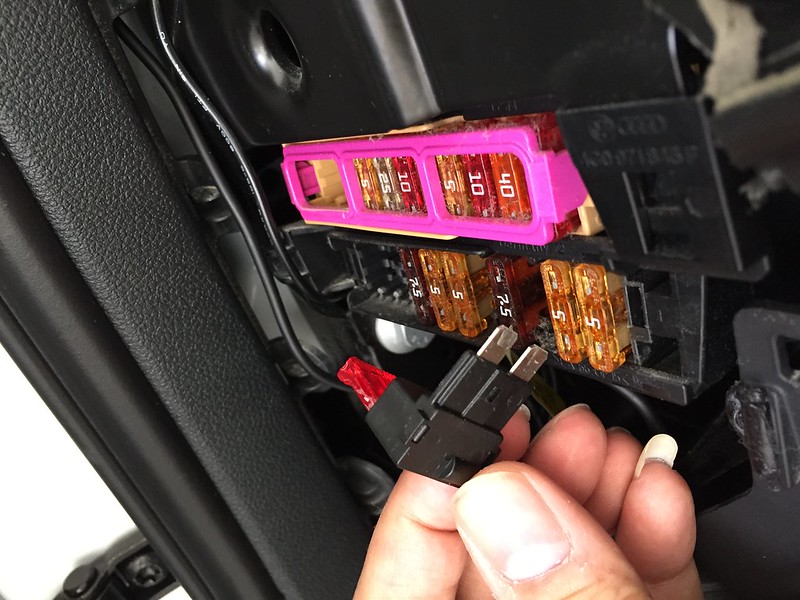
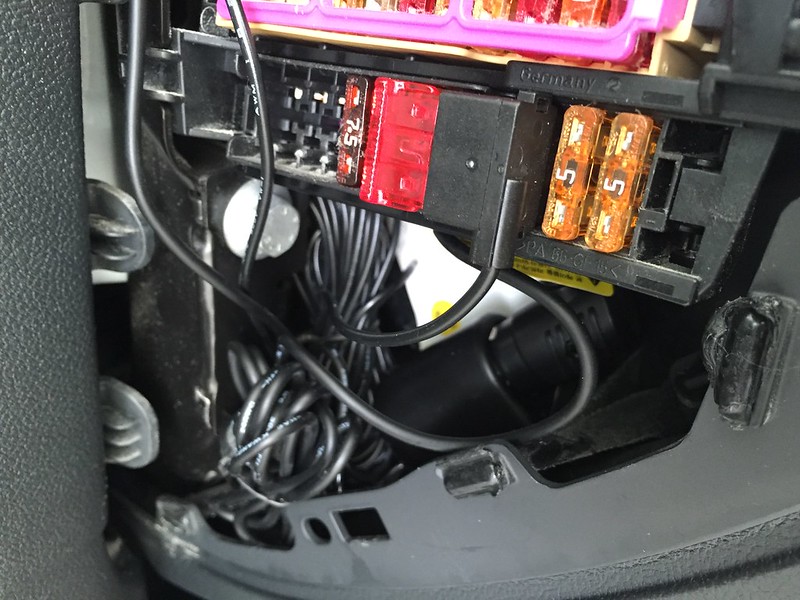
On the left pax side of the dash, you can easily open the fuse cover using the pry tools. Once open, insert the 12V socket positive with fuse into black fuse box slot 3. This is the CD changer fuse and will not cause any error. In the event when battery is low, the system will cut the power supply to save the battery. So there's no need to buy whatever power magic or other gadget for Audi actually.
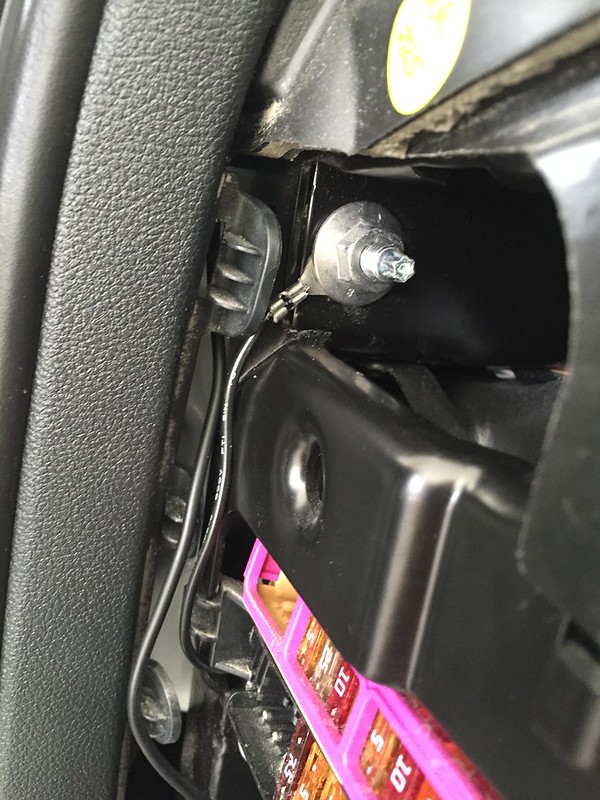
Then there's another end "the ground cable" just secure it at this screw.
Now you are done with the power, simply plug it in.
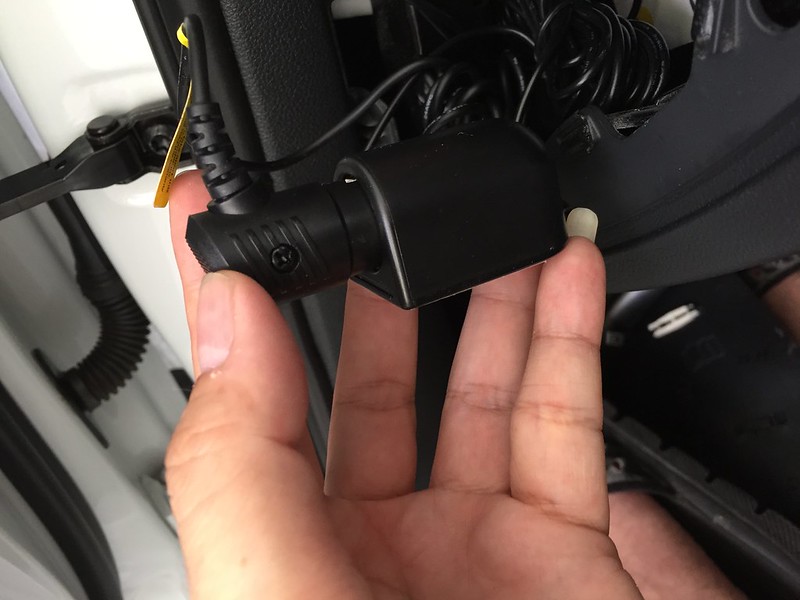
Thereafter, thread the cable up to the A pillar and secure it near the screw with a cable tie
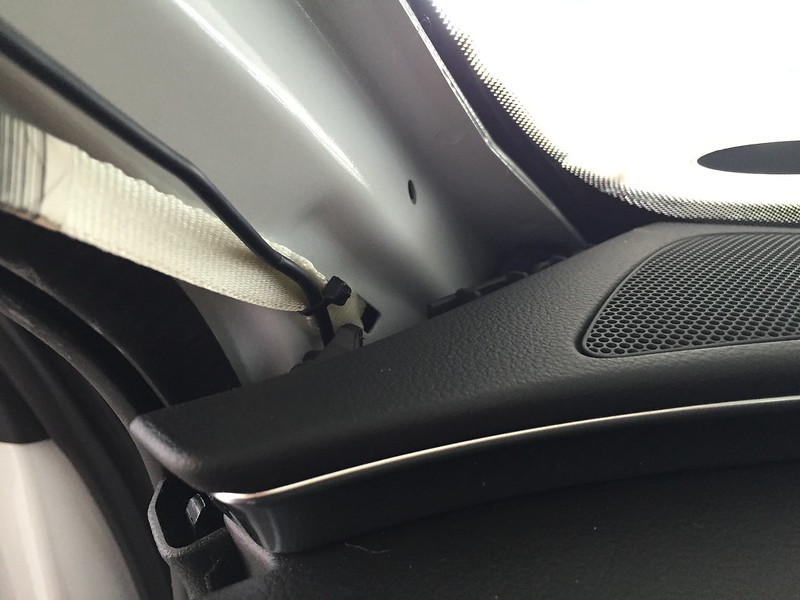
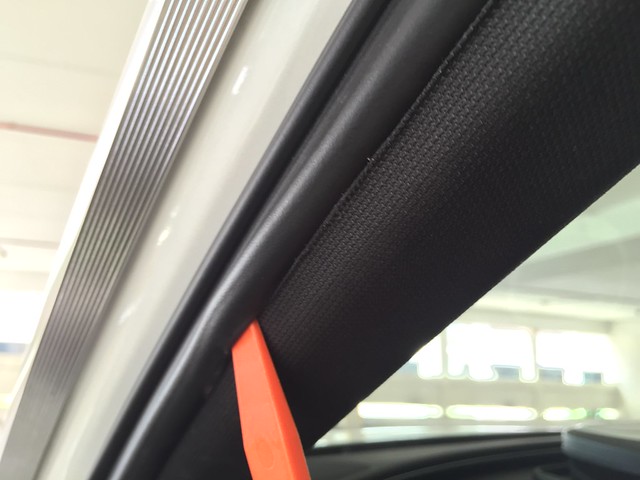
Move up and stuff the cable into the headlining. Using the pry tool, cash card wrappedd with cloth or your finger and cloth.
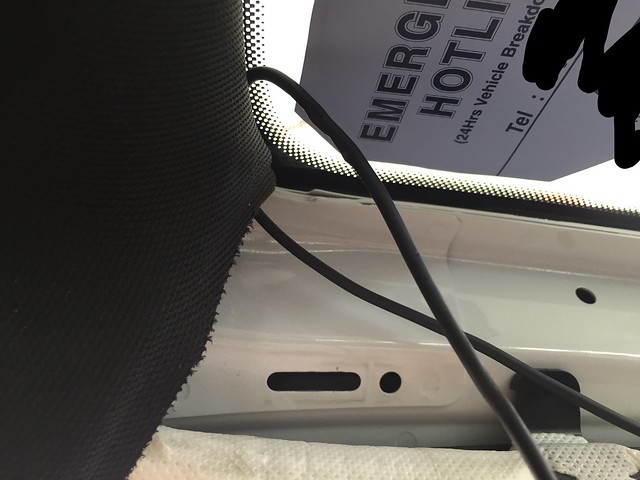
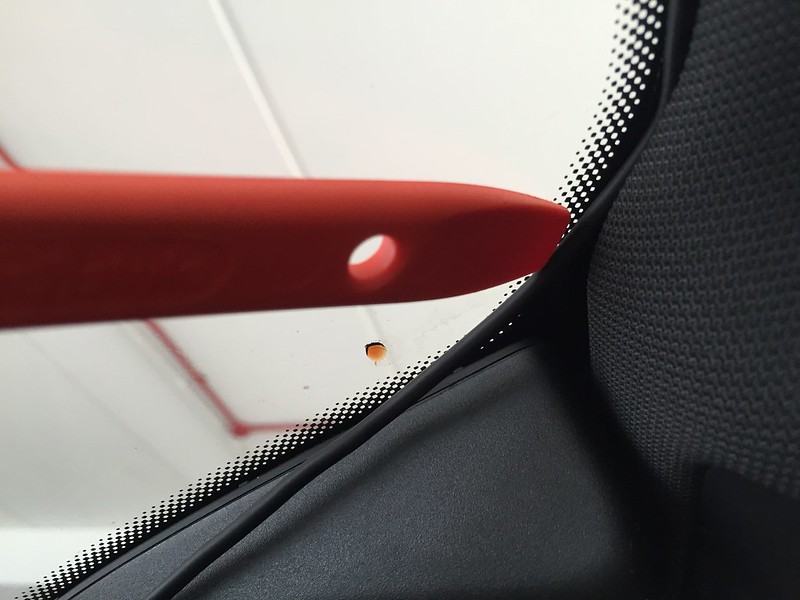
Pull back to remove excess length. Use the cable clip at the 2 corners (bends) so the cable look neat and don't dangle.
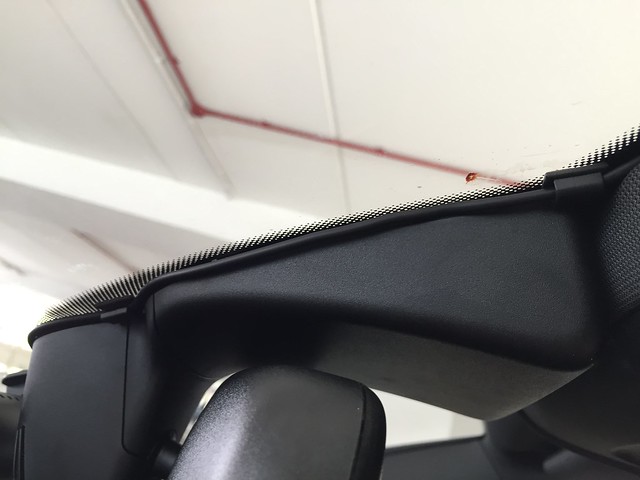
Now insert the A pillar trim back to the dash by applying force downwards. Take note of the joint with the next panel at the fuse box area. Make sure the tab is on top (outwards) of the A pillar trim hole.
1) Things you require:
- Pry tools (buy from Autobac)
- 2 cable ties (buy from anywhere, Homefix or Self fix)
- wire holding clips (buy from Autobac)
- 12V Socket tap to fuse (buy from Autobac)
- Camera of course
- Long nose plier (to remove the A pillar trim clips)


2) Next, Just stick the camera on the windscreen behind the rear view mirror. Note to align the lens to the centre of the vehicle.

3) Next step is the most difficult part but if do correctly, it can be quite easy. Just need the right motion and force.
REMOVING A PILLAR. The A pillar of the A6 C7 is the hardest to remove because of the 3 clips behind the trim, 2 of them are non-removable by prying. It has to be slot upwards, then remove the clip with a plier from the pillar then install back to the trim. If done correctly, it can be very easy.
First, remove the Airbag clip with the pry tool. Don't worry, there's no airbag behind this clip and you will not activate the airbag no matter what you do to the A pillar. Use your finger nail to pull it out a little then insert the pry tool and slowly go around it with the pry tool to lift it out of the notch. The main clip holding it are on the side, left and right of the word "AIR BAG"

Second, pull the top and first clip outwards

Third, it is almost impossible to pull outwards to dislodge the 2nd and 3rd clip. You have to combine upward motion plus outward motion to dislodge the A pillar. The trick is to hold the top part and make sure it is clear of the headlining and towards you. If you get this right, it is easy as a breeze.

This the top clip, as you can see it there's no jaw so it will come out when you pry it.

This is the 2nd and 3rd clip mount on the trip. After you remove the trim, the clip will stay on the pillar. Remove it from the pillar with the plier and reinsert on the trim for installation later.


Now the pillar should be bare. So you can start routing the cable and install the 12V socket.
On the left pax side of the dash, you can easily open the fuse cover using the pry tools. Once open, insert the 12V socket positive with fuse into black fuse box slot 3. This is the CD changer fuse and will not cause any error. In the event when battery is low, the system will cut the power supply to save the battery. So there's no need to buy whatever power magic or other gadget for Audi actually.


Then there's another end "the ground cable" just secure it at this screw.

Now you are done with the power, simply plug it in.

Thereafter, thread the cable up to the A pillar and secure it near the screw with a cable tie

Move up and stuff the cable into the headlining. Using the pry tool, cash card wrappedd with cloth or your finger and cloth.


Pull back to remove excess length. Use the cable clip at the 2 corners (bends) so the cable look neat and don't dangle.

Now insert the A pillar trim back to the dash by applying force downwards. Take note of the joint with the next panel at the fuse box area. Make sure the tab is on top (outwards) of the A pillar trim hole.


